Running local text to image the easy way
Hello again~!!
Today I will show you how to easily install a local text to image tool on windows that will work with a variety of user interfaces available.
You can run a number of different models as well..
stabilitymatrix install#
-
Go to: Stability Matrix and download the latest release.
-
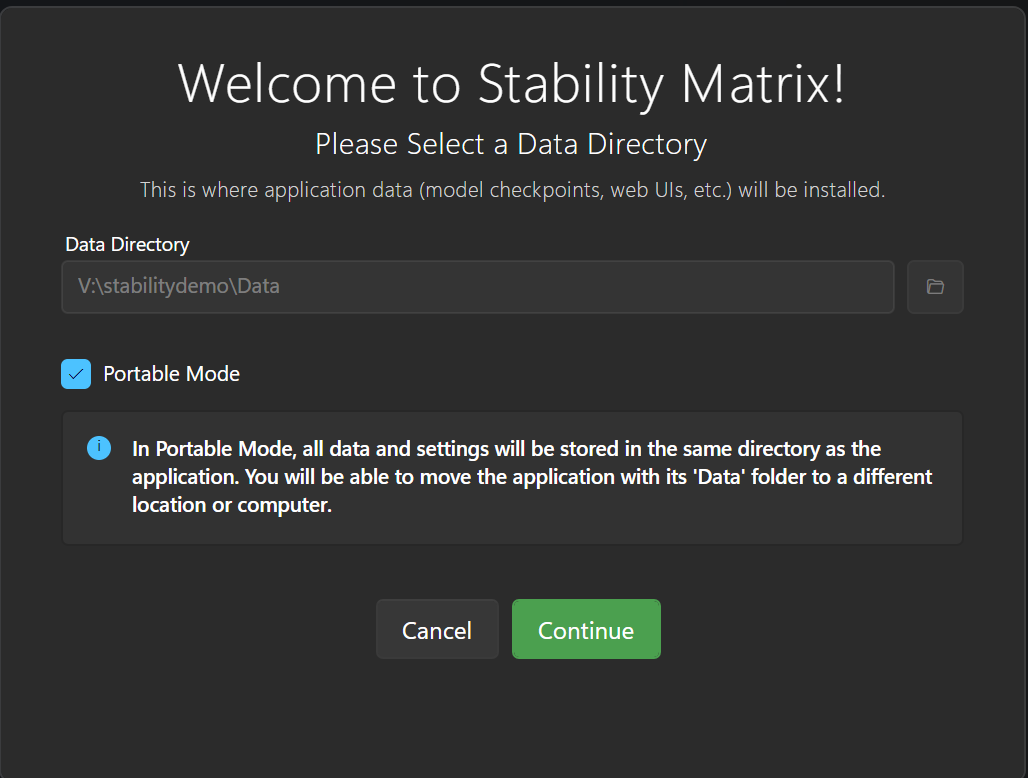
When this download is completed, go to your preferred storage place on your pc/network, make a new folder, mine is just named stability matrix, extract the executable file here.
Note that the above step is unnecessary if you are not using stability as a portable application, but for the purposes of this tutorial, and for my specific use case I am.
-
Run stability matrix, and you will see this screen.
!
-
Continue with the setup wizard until you get prompted to choose your interface, here I will be choosing stable diffusion webui forge.
!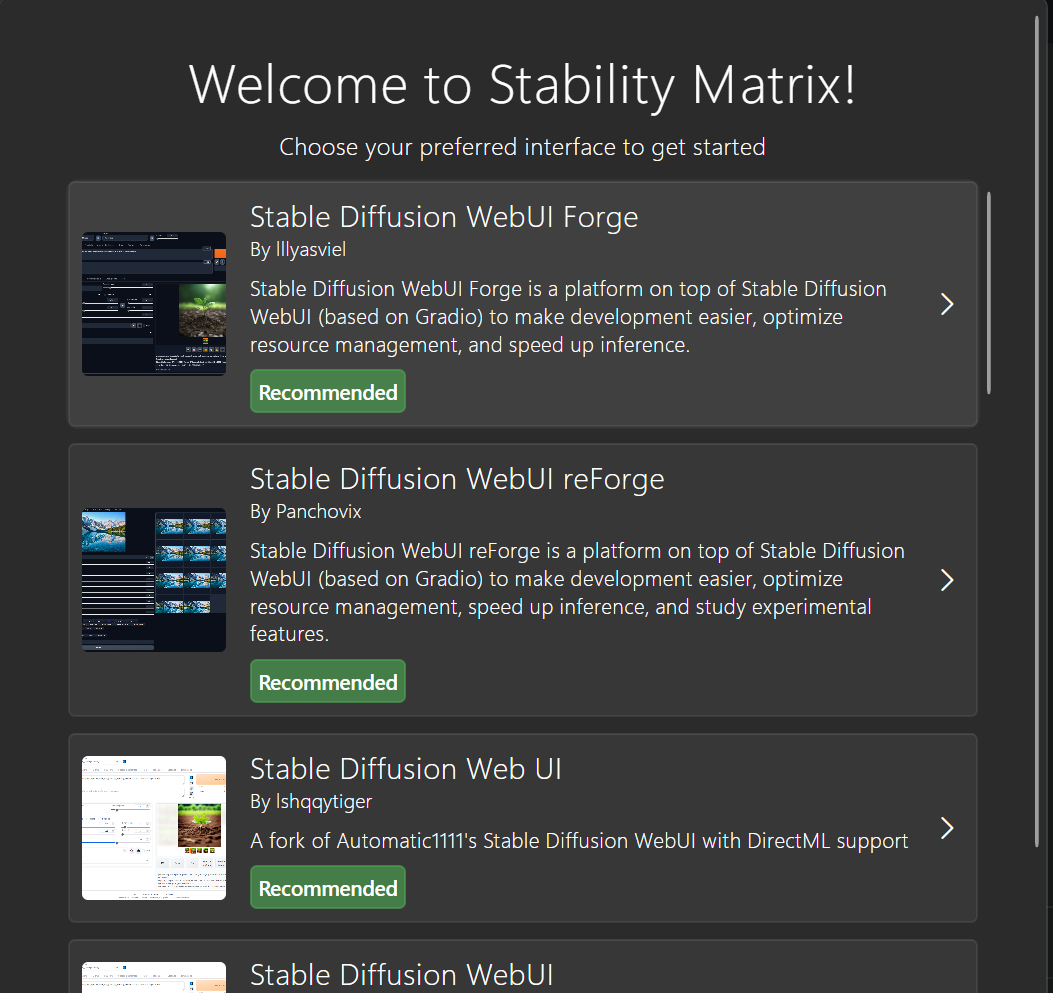
there are a number of different interfaces available including ones not listed on the first launch like comfy ui, which is an advanced but much harder to learn interface.
-
Next you will be asked what models you would like to use, a handful of options will be presented for both the stable diffusion 1.5 and XL base models. most people will likely opt for the 1.5 models however I will say, myself running a RTX 3060 12GB card, XL runs speedily for up to 1000x1000 pixels generation, and fine for up to 1920x1080 anything more and this card struggles.
You can additionally find more bespoke models online on websites such as civit and huggingface.
-
Note that stablediff models are very easy to set up, but flux based models will require more tinkering, I may make a flux specific tutorial at a later date.
-
When the model has been downloaded you should be greeted with a screen like this. !
 If you are intending to only access the webui from this specific system, you can click launch, and ignore the below instructions until you get to how to use stable diffusion webui forge.
If however you want to access it from other systems, mobile devices and the like, first click the gear icon.
Doing so will open the launch options.
!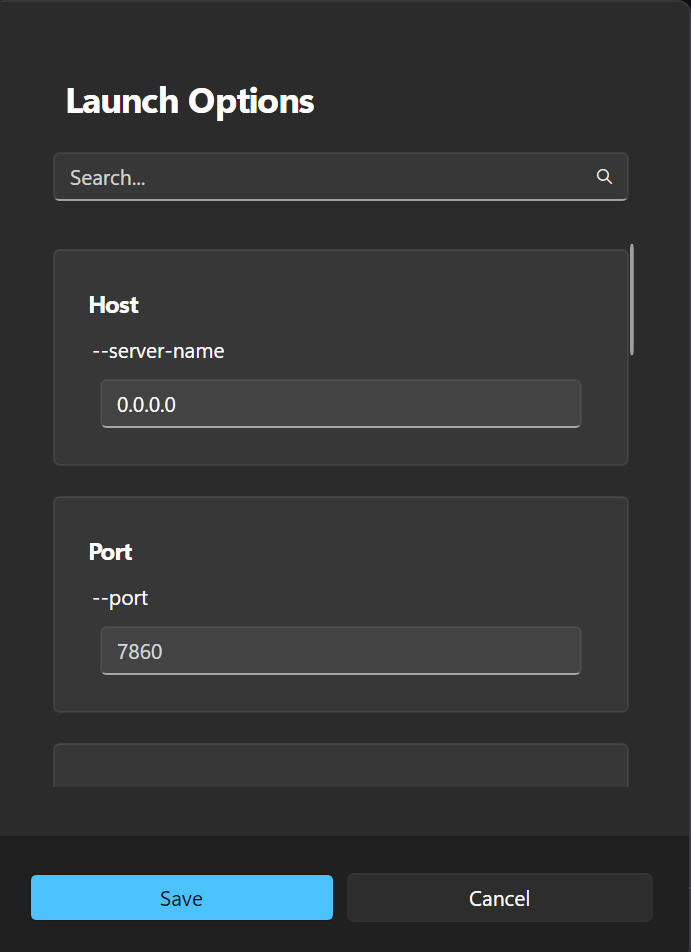
Your window should read, localhost, or 127.0.0.1, under the host section, changing this to 0.0.0.0 will allow you to connect to the webui via the ip address of the system running stability.
To find out what said ip address is press the windows button on your keyboard, type cmd and hit enter, this will open a terminal, type ipconfig and hit enter, you will now get a semi detailed view of your network interfaces, including ipv4, look for something like this, 192.168.###.###.
192.168. being the default subnet most people are on, if you are on a different one, you likely didn’t need me to tell you how to find your devices ip address.
This ip address, and the port will be what you enter into a web browser on your other devices to connect to the web interface, an example could look like this, 192.168.0.13:7860.
how to use stable diffusion webui forge#
After launching the interface, it will take a while to get started, when it is done it will open automatically in your default web browser, and you will be greeted with the webui. If the webui does not open automatically, you can instead go to your preferred browser and search for localhost:7860.
!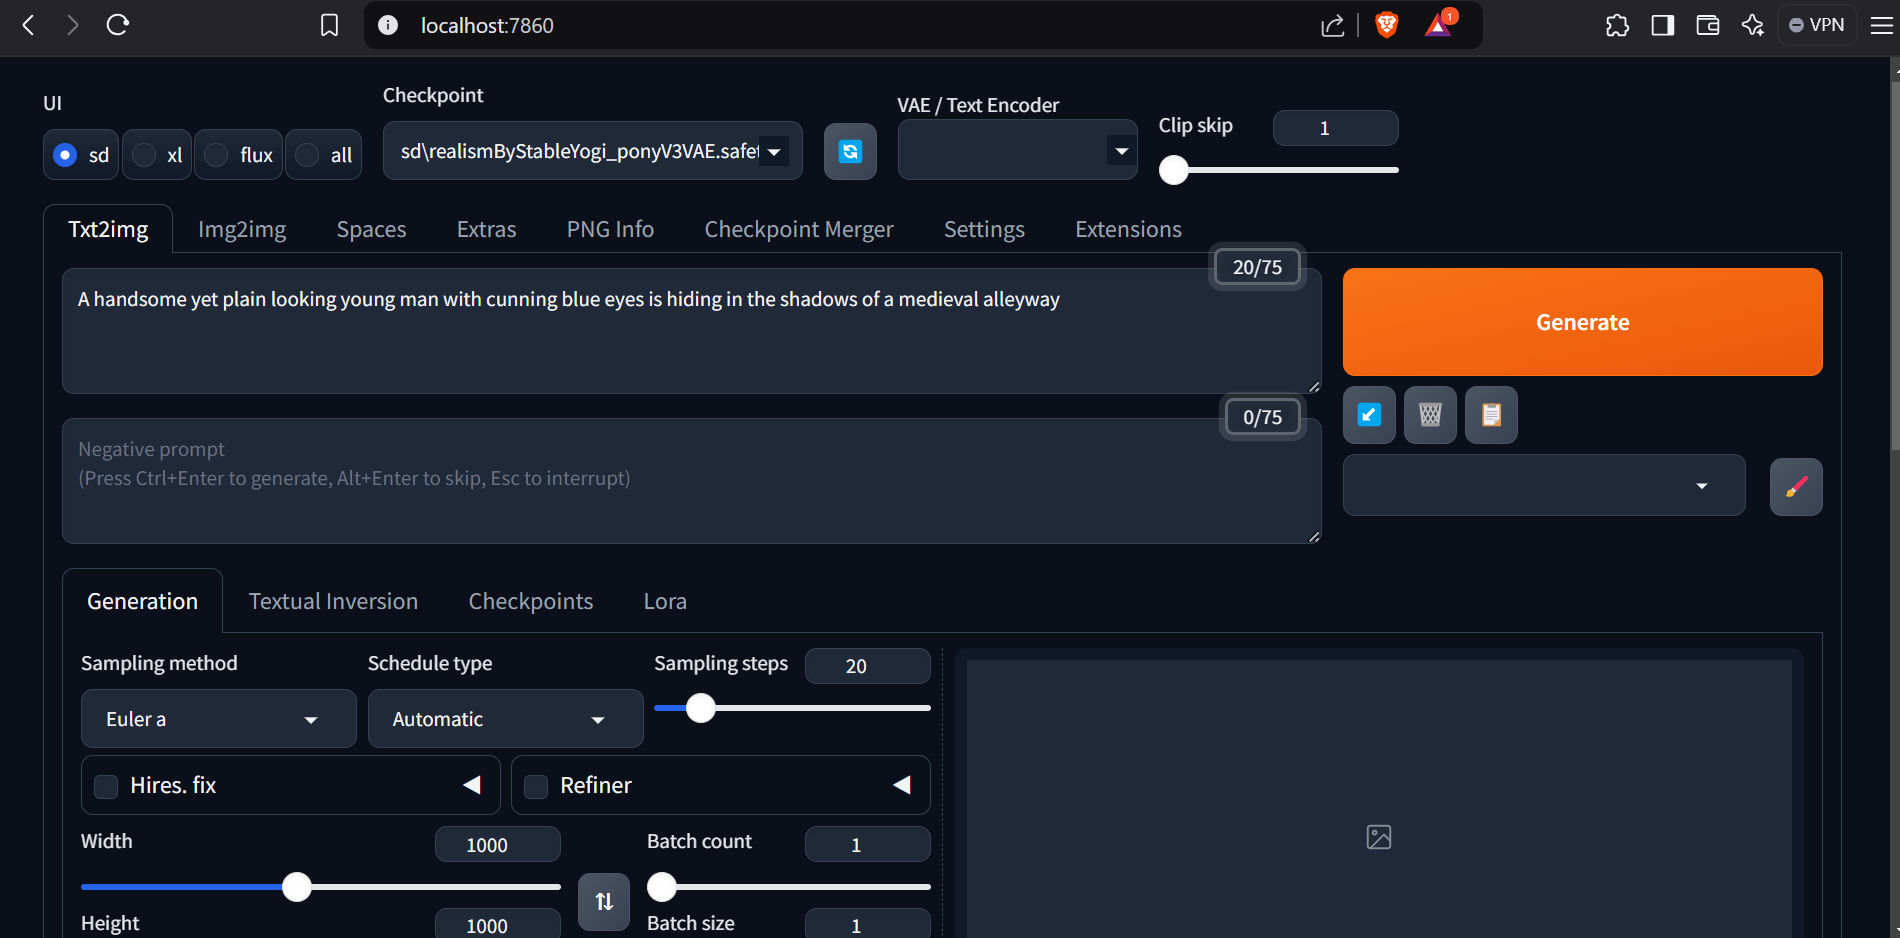 This is what the webui looks like, with “Checkpoint” being the model selection, you won’t have my specific one.
A full deep dive into this webui is far above my paygrade so this is where I will end this tutorial. I hope it was easy to follow and you will have fun enjoying our brave new world of ai!!
This model with above prompt created this image.
!
the aforementioned flux, creates with the same prompt this.
!
My purpose for this prompt was a virtual webcam image for the DnD campaign I was in, the flux model was vastly superior for this.